Sound Sensor Relay Switch Module, 12V/24V Microphone Light Sensor Controller Module 3s~60s Adjustable Relay Delay Switch Module
Sound Sensor Relay Switch Module, 12V/24V Microphone Light Sensor Controller Module 3s~60s Adjustable Relay Delay Switch Module
Sound Sensor Relay Switch Module, 12V/24V Microphone Light Sensor Controller Module 3s~60s Adjustable Relay Delay Switch Module
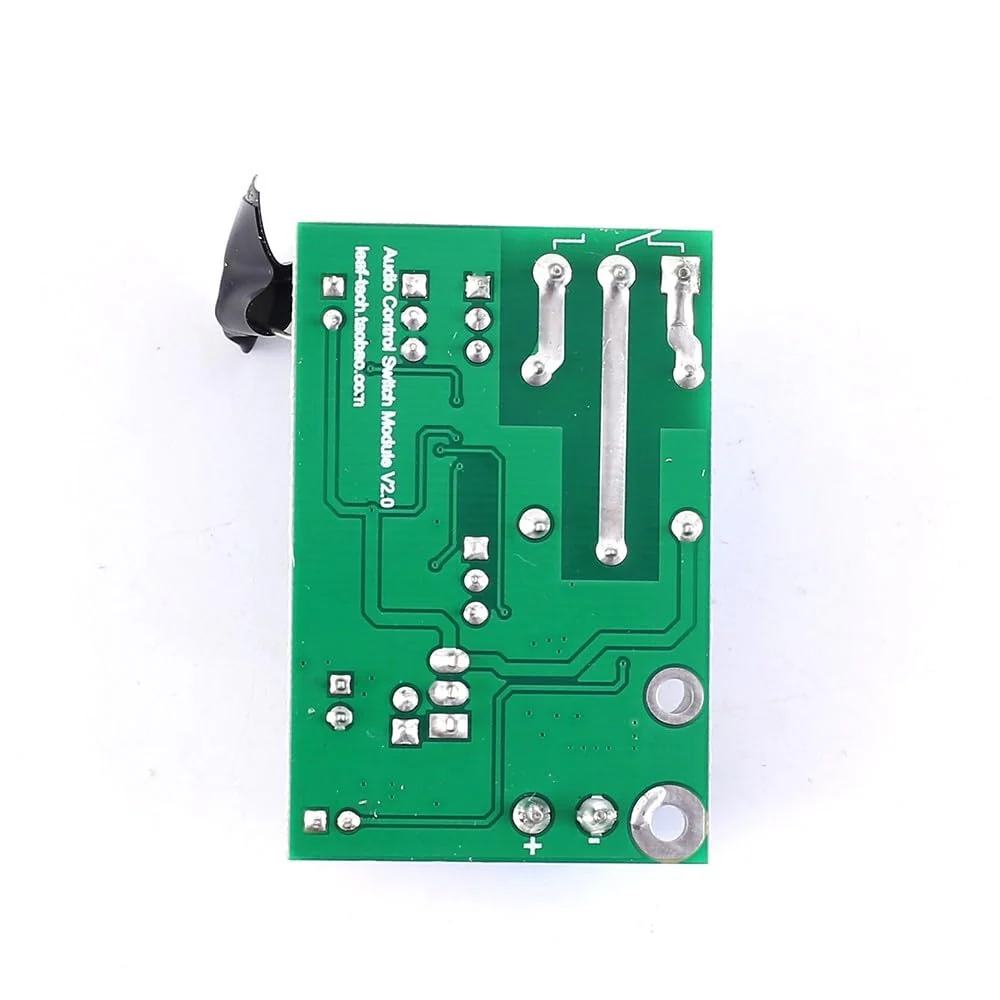
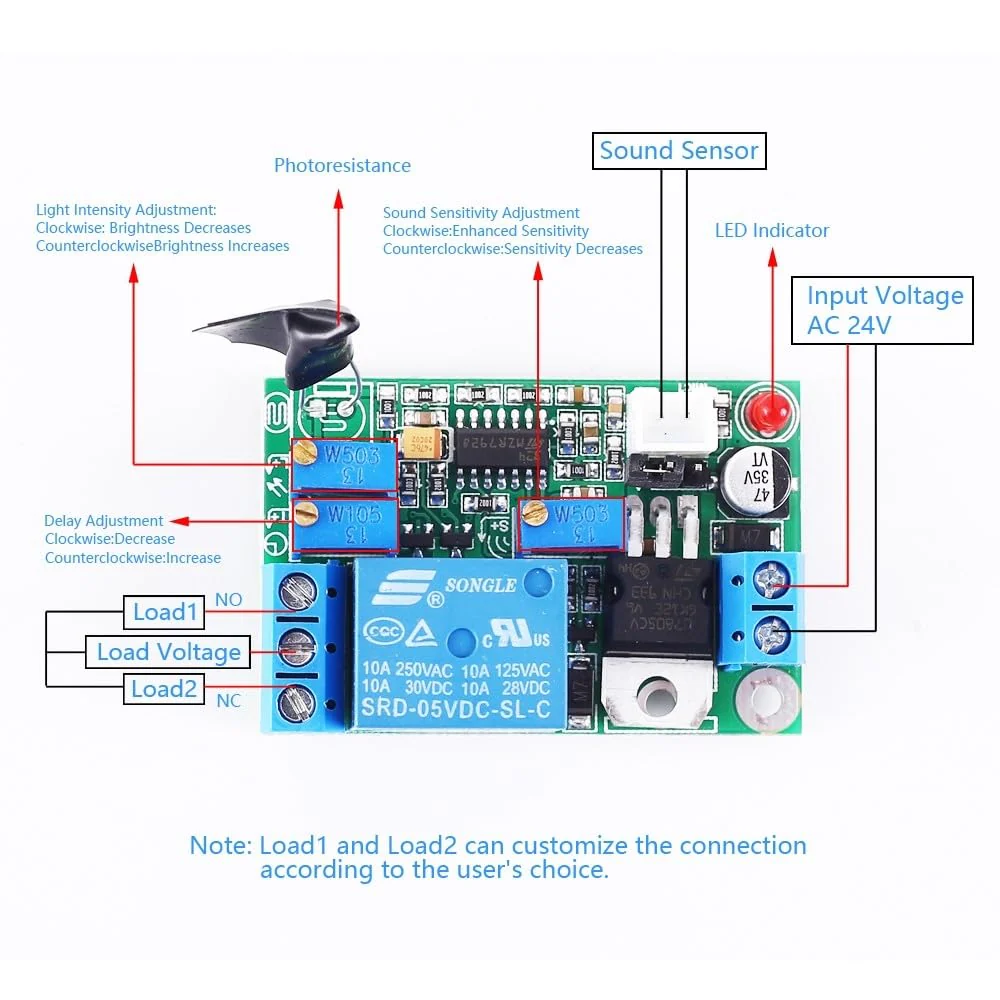
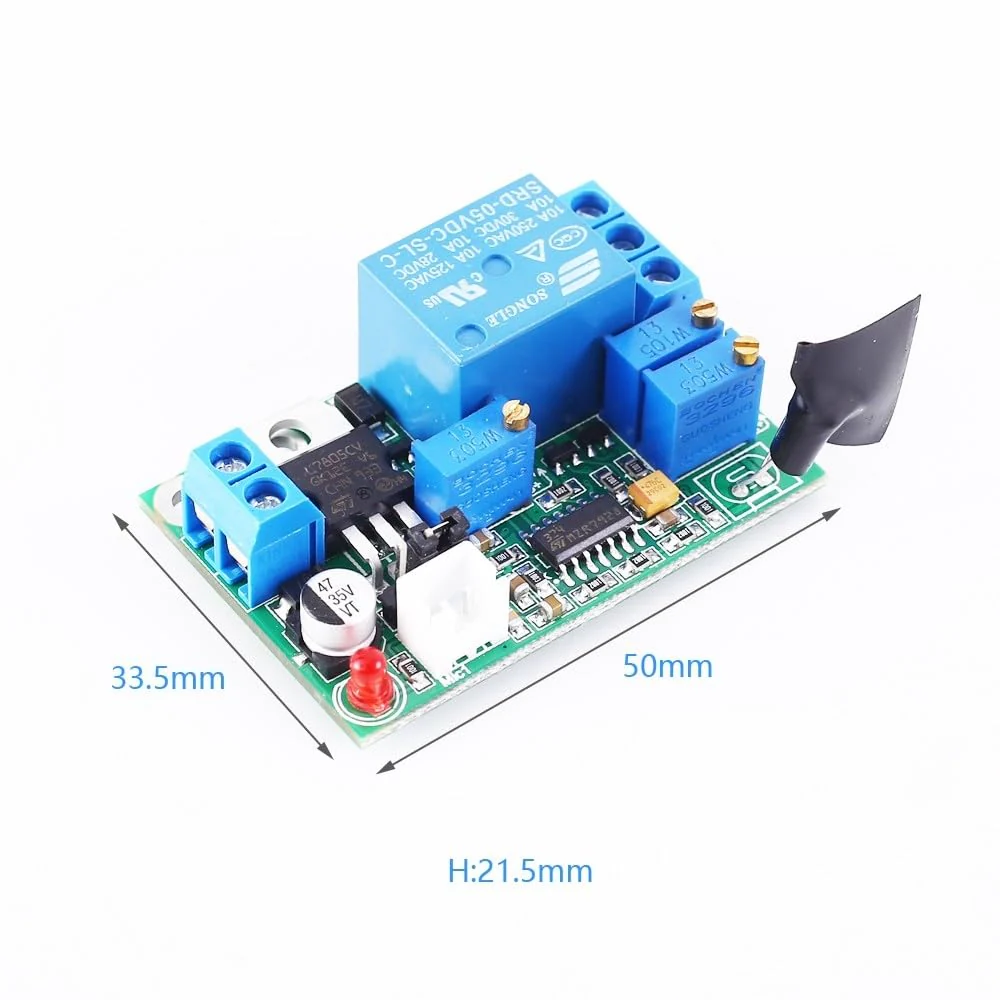
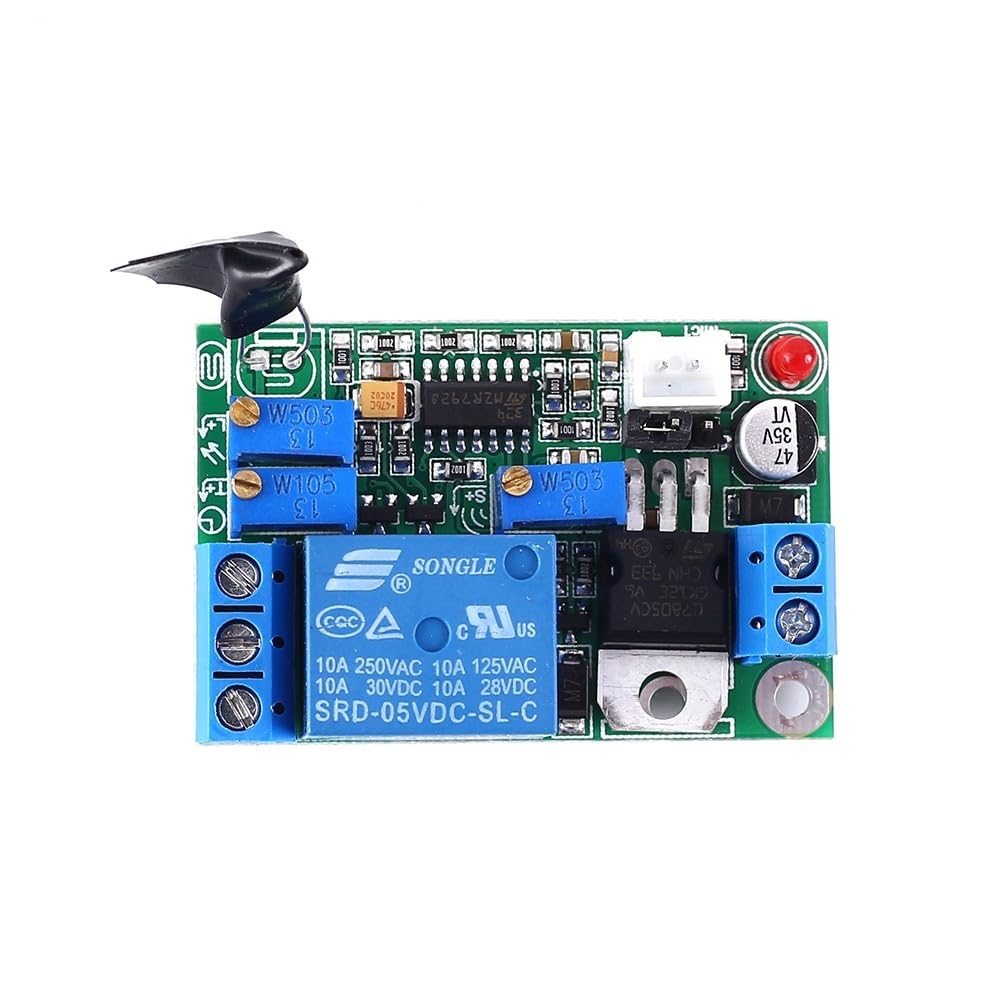
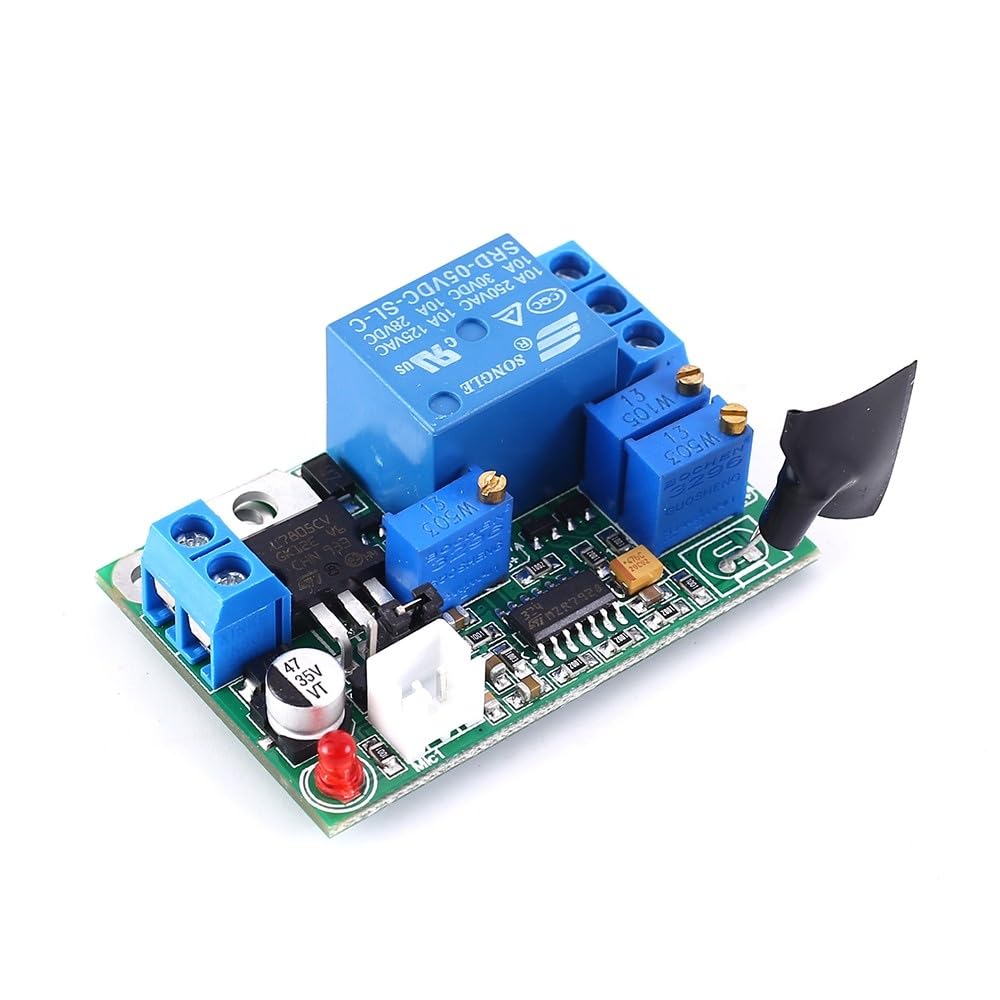
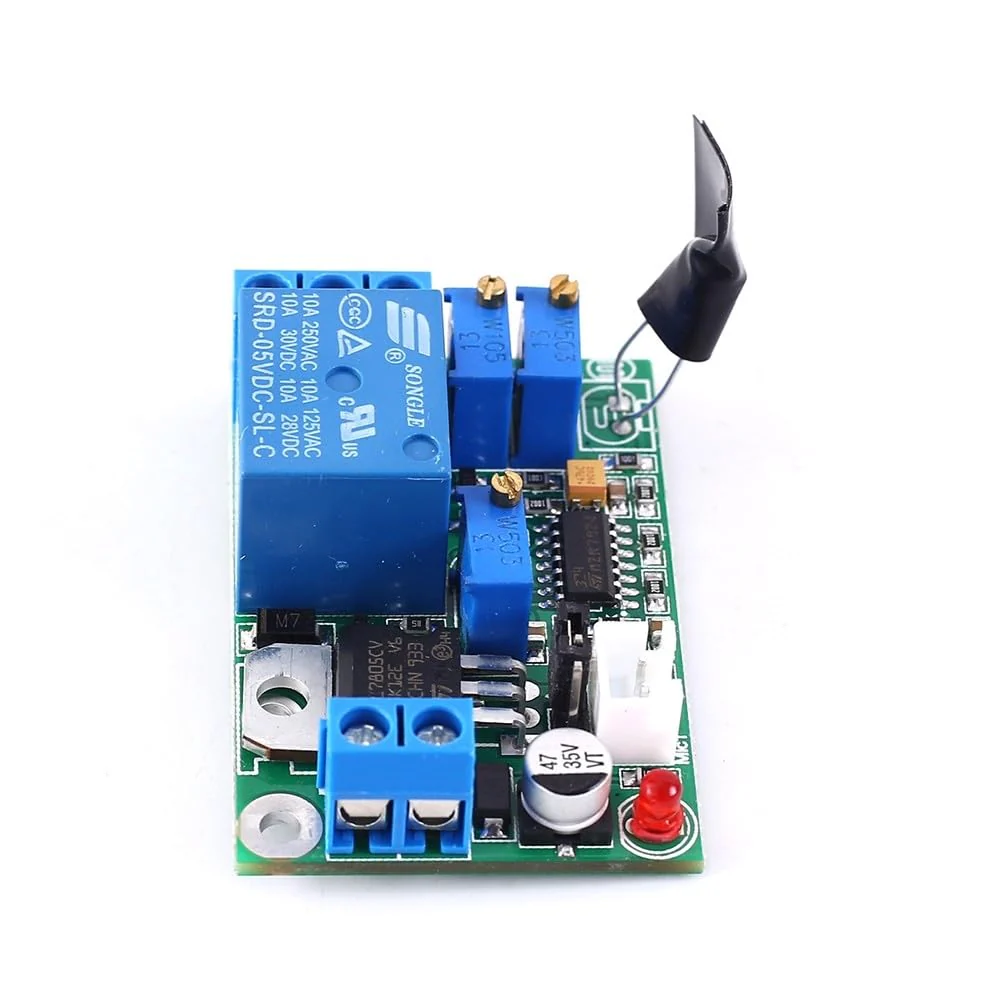
Description: Product name: relay switch module. Input voltage: 24 V. Sound intensity threshold range: 20 dB ~ 90 dB. Light intensity threshold range: 10Lx ~ 10000Lx. Delay time: 1s ~ 60s (inaccurate delay, delay in capacitor charging and discharging related to the triggering tone) Maximum load current: 10 A/220 V. Use method and introduction: 1. Make sure the photo resistor is wrapped with black tape (the module is a light-free open type, which corresponds to turning off the light control function before debugging). 2. Power the module: confirm the positive polarity (the reverse connection does not burn through but does not work) 3. Adjust the delay knob clockwise to minimize delay and make it easier to adjust the sound intensity. 4. When debugging in a quieter environment, the sensitivity threshold adjustment knob increases counterclockwise sensitivity and reduces sensitivity clockwise. 5. First set clockwise so that the relay does not close (the LED goes out). Then talk or clap your hands to see if the LED lights up (as it gradually turns to the shortest value, it goes out immediately afterwards). Adjust the setting gradually until you need the desired sensitivity. 6. After the sound intensity is set correctly, gradually set the delay timer counterclockwise by talking or clapping to trigger the module until the desired delay time is reached. Gradually expand to 1 minute. 7. If you want to use the light control function (only pull if there is no light), remove the black tape from the photo resistor and adjust the light intensity button. Turn clockwise to dim the light and counterclockwise to make it stronger. Turn off the light control function and simply cover the photo resistor with opaque tape.
Product Features
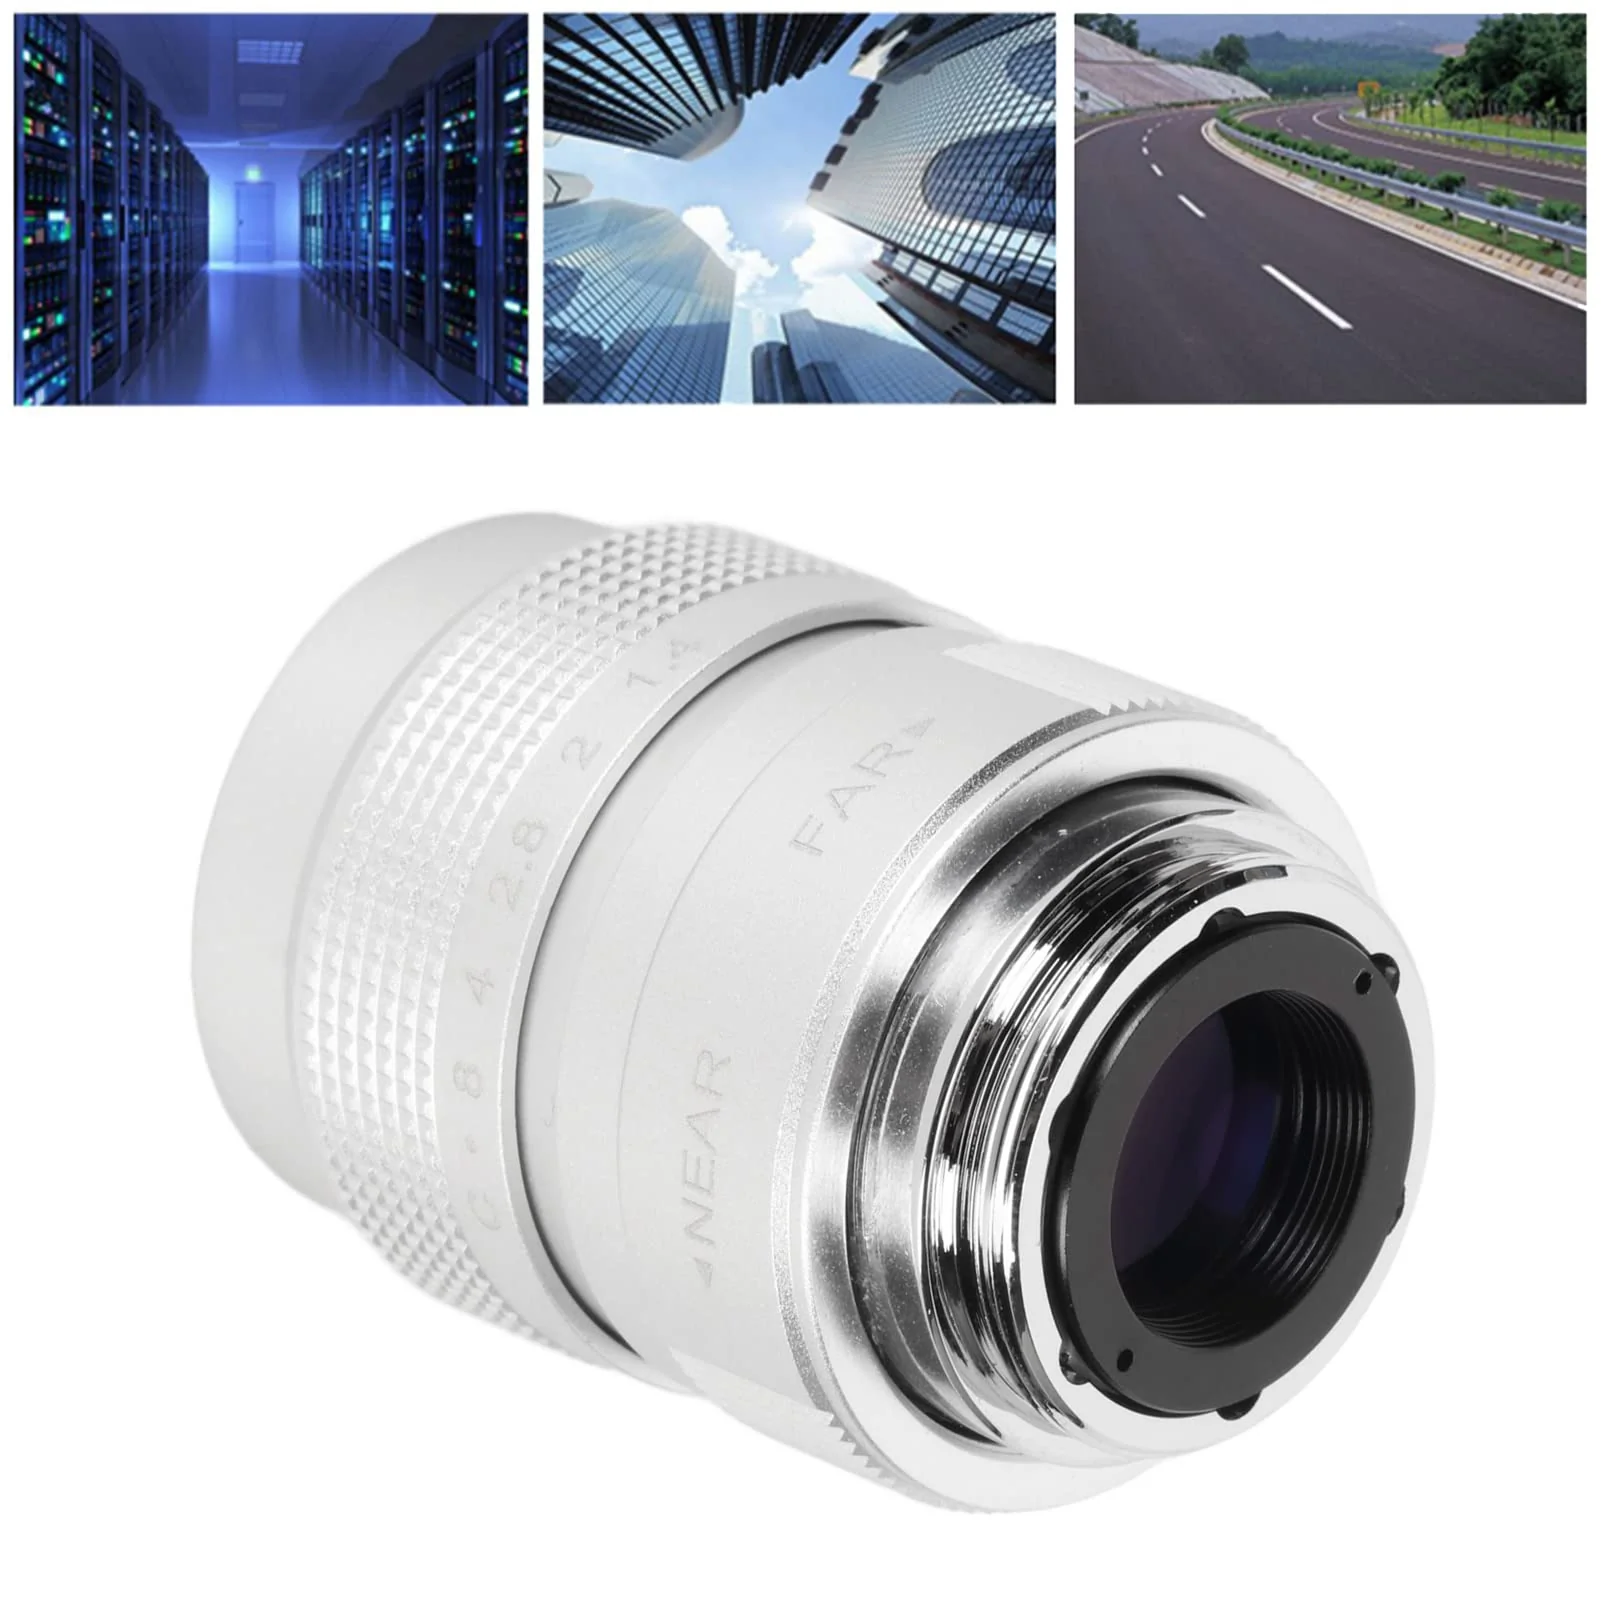
- It is a relay switching module. It can automatically detect ambient noise and light intensity. When the sound exceeds a set threshold, the relay automatically pulls, delays for a certain period of time, and then turns off. The light control function can be activated or disabled. It can be used to control the device and turn on below a certain sound/light intensity.
- Features: 1>.Product built-in relay switch; 2>.It can adjust the acousto-optical control threshold; 3>.It can adjust the delay time; 4>.It can only use the voice control function, or it can be used at the same time; 5>.It has a reverse polarity protection function, the power supply does not work reverse and the module is not damaged; 6>. It supports a wide voltage .
- Introduction The module uses a multi-turn precision potentiometer, which can rotate for up to about 30 weeks, so please adjust it patiently. After turning to the head, a slight click is heard. Do not turn it at this time.
- Use method: first turn off the light control function, set the delay to the minimum, adjust the sound intensity, then set the delay, and finally adjust the light intensity. Be careful not to select the wrong power supply pin.
- Notes: 1. The higher the supply voltage, the stronger the module heats up. This is a normal phenomenon. For long-term operation, it is recommended that the voltage is below 24V. 2. The sensor cable is a wear part. It is recommended to use it with care or prepare spare parts. 3. This module has a certain technical content, should buy it with care.
More Images

Sound Sensor Relay Switch Module, 12V/24V Microphone Light Sensor Controller Module 3s~60s Adjustable Relay Delay Switch Module
Sound Sensor Relay Switch Module, 12V/24V Microphone Light Sensor Controller Module 3s~60s Adjustable Relay Delay Switch Module
Description: Product name: relay switch module. Input voltage: 24 V. Sound intensity threshold range: 20 dB ~ 90 dB. Light intensity threshold range: 10Lx ~ 10000Lx. Delay time: 1s ~ 60s (inaccurate delay, delay in capacitor charging and discharging related to the triggering tone) Maximum load current: 10 A/220 V. Use method and introduction: 1. Make sure the photo resistor is wrapped with black tape (the module is a light-free open type, which corresponds to turning off the light control function before debugging). 2. Power the module: confirm the positive polarity (the reverse connection does not burn through but does not work) 3. Adjust the delay knob clockwise to minimize delay and make it easier to adjust the sound intensity. 4. When debugging in a quieter environment, the sensitivity threshold adjustment knob increases counterclockwise sensitivity and reduces sensitivity clockwise. 5. First set clockwise so that the relay does not close (the LED goes out). Then talk or clap your hands to see if the LED lights up (as it gradually turns to the shortest value, it goes out immediately afterwards). Adjust the setting gradually until you need the desired sensitivity. 6. After the sound intensity is set correctly, gradually set the delay timer counterclockwise by talking or clapping to trigger the module until the desired delay time is reached. Gradually expand to 1 minute. 7. If you want to use the light control function (only pull if there is no light), remove the black tape from the photo resistor and adjust the light intensity button. Turn clockwise to dim the light and counterclockwise to make it stronger. Turn off the light control function and simply cover the photo resistor with opaque tape.
Product Features
- It is a relay switching module. It can automatically detect ambient noise and light intensity. When the sound exceeds a set threshold, the relay automatically pulls, delays for a certain period of time, and then turns off. The light control function can be activated or disabled. It can be used to control the device and turn on below a certain sound/light intensity.
- Features: 1>.Product built-in relay switch; 2>.It can adjust the acousto-optical control threshold; 3>.It can adjust the delay time; 4>.It can only use the voice control function, or it can be used at the same time; 5>.It has a reverse polarity protection function, the power supply does not work reverse and the module is not damaged; 6>. It supports a wide voltage .
- Introduction The module uses a multi-turn precision potentiometer, which can rotate for up to about 30 weeks, so please adjust it patiently. After turning to the head, a slight click is heard. Do not turn it at this time.
- Use method: first turn off the light control function, set the delay to the minimum, adjust the sound intensity, then set the delay, and finally adjust the light intensity. Be careful not to select the wrong power supply pin.
- Notes: 1. The higher the supply voltage, the stronger the module heats up. This is a normal phenomenon. For long-term operation, it is recommended that the voltage is below 24V. 2. The sensor cable is a wear part. It is recommended to use it with care or prepare spare parts. 3. This module has a certain technical content, should buy it with care.
Product Information
Product Information
Shipping & Returns
Shipping & Returns
Description
Sound Sensor Relay Switch Module, 12V/24V Microphone Light Sensor Controller Module 3s~60s Adjustable Relay Delay Switch Module
Description: Product name: relay switch module. Input voltage: 24 V. Sound intensity threshold range: 20 dB ~ 90 dB. Light intensity threshold range: 10Lx ~ 10000Lx. Delay time: 1s ~ 60s (inaccurate delay, delay in capacitor charging and discharging related to the triggering tone) Maximum load current: 10 A/220 V. Use method and introduction: 1. Make sure the photo resistor is wrapped with black tape (the module is a light-free open type, which corresponds to turning off the light control function before debugging). 2. Power the module: confirm the positive polarity (the reverse connection does not burn through but does not work) 3. Adjust the delay knob clockwise to minimize delay and make it easier to adjust the sound intensity. 4. When debugging in a quieter environment, the sensitivity threshold adjustment knob increases counterclockwise sensitivity and reduces sensitivity clockwise. 5. First set clockwise so that the relay does not close (the LED goes out). Then talk or clap your hands to see if the LED lights up (as it gradually turns to the shortest value, it goes out immediately afterwards). Adjust the setting gradually until you need the desired sensitivity. 6. After the sound intensity is set correctly, gradually set the delay timer counterclockwise by talking or clapping to trigger the module until the desired delay time is reached. Gradually expand to 1 minute. 7. If you want to use the light control function (only pull if there is no light), remove the black tape from the photo resistor and adjust the light intensity button. Turn clockwise to dim the light and counterclockwise to make it stronger. Turn off the light control function and simply cover the photo resistor with opaque tape.
Product Features
- It is a relay switching module. It can automatically detect ambient noise and light intensity. When the sound exceeds a set threshold, the relay automatically pulls, delays for a certain period of time, and then turns off. The light control function can be activated or disabled. It can be used to control the device and turn on below a certain sound/light intensity.
- Features: 1>.Product built-in relay switch; 2>.It can adjust the acousto-optical control threshold; 3>.It can adjust the delay time; 4>.It can only use the voice control function, or it can be used at the same time; 5>.It has a reverse polarity protection function, the power supply does not work reverse and the module is not damaged; 6>. It supports a wide voltage .
- Introduction The module uses a multi-turn precision potentiometer, which can rotate for up to about 30 weeks, so please adjust it patiently. After turning to the head, a slight click is heard. Do not turn it at this time.
- Use method: first turn off the light control function, set the delay to the minimum, adjust the sound intensity, then set the delay, and finally adjust the light intensity. Be careful not to select the wrong power supply pin.
- Notes: 1. The higher the supply voltage, the stronger the module heats up. This is a normal phenomenon. For long-term operation, it is recommended that the voltage is below 24V. 2. The sensor cable is a wear part. It is recommended to use it with care or prepare spare parts. 3. This module has a certain technical content, should buy it with care.